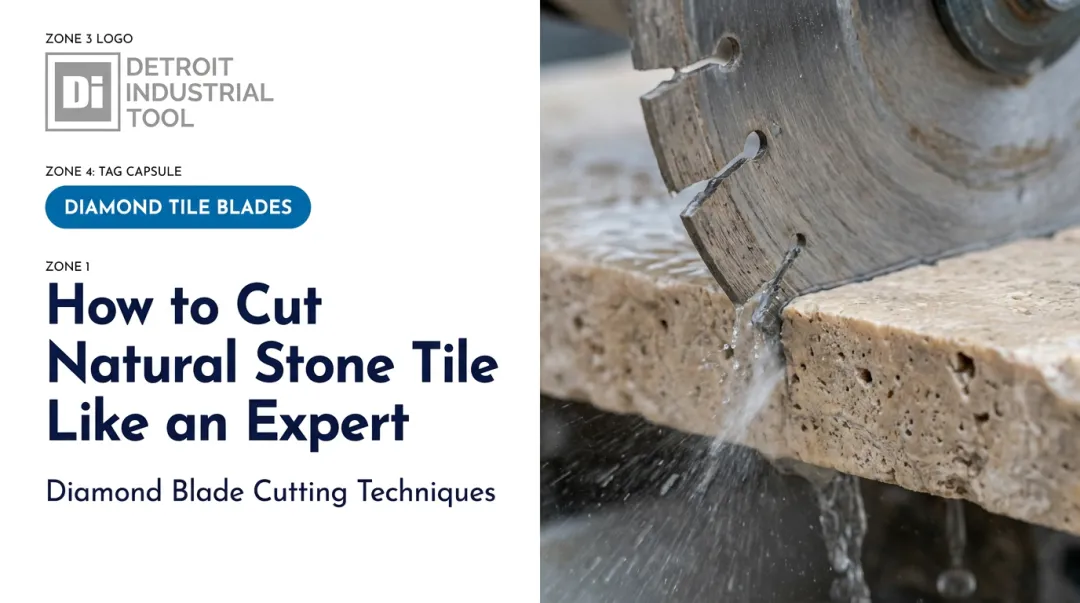

But the process only looks simple. Blade choice, feed technique, and safety setup all shape whether you get a clean slab or a cracked, chipped mess. A rushed or dry cut can ruin a specimen in seconds, and cutting stone without water creates a genuine health hazard.
This guide walks through the exact steps, what to gather beforehand, the variables that actually affect cut quality, common mistakes, and the point where a tile saw stops being the right tool for the job.
Key Takeaways
- A continuous rim diamond blade cuts agate, jasper, and similar rocks within its depth capacity.
- Water isn't optional. It cools the blade, knocks down silica dust, and stops heat cracks.
- Pull the rock toward you, don't push it, for cleaner cuts and less kickback risk.
- Blade quality, feed rate, and rock hardness separate a clean slab from a chipped one.
- Large slabs or very hard stone often call for a dedicated trim or slab saw instead.
How to Cut Rocks With a Wet Tile Saw
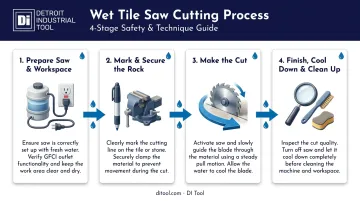
Cutting rock on a tile saw comes down to four stages: setup, marking, the cut itself, and cleanup. Skipping any one of them is usually where things go wrong.
Step 1: Prepare the Saw and Workspace
Fill the water reservoir until the pump intake sits fully submerged. Confirm the diamond blade is mounted securely and spins freely with no wobble. A quality blade, such as DI Tool's diamond and tile blade lineup, holds its edge longer and cuts more consistently.
- Power on the saw before touching any rock to it, and check that water sprays evenly across the entire blade.
- Set up outdoors or in a well-ventilated space. Silica dust and standing water both need room to disperse.
- Position the saw at least 6 feet from electrical outlets, and only plug into a GFCI-protected outlet. Water and electricity are a bad combination without one.
Step 2: Mark and Secure the Rock
Trace your intended cut line on the rock with a permanent marker or a scribe. Give the rock a quick soak in a bucket of water first, so the blade isn't making dry contact on its first pass.
With the cut line marked and the rock soaked, secure it firmly before cutting. Grip the rock on both sides, or better yet, clamp it in a vise or fence if your saw has one. Keep your fingers well clear of where the blade will travel.
Step 3: Make the Cut
Position the rock behind the blade and pull it toward yourself along the marked line. This directs water spray and debris away from your body instead of into it.
- Apply light, even pressure. Let the diamond blade grind through the stone rather than forcing it.
- Watch your line, not the blade itself, to keep the cut straight.
- If the rock exceeds the blade's depth capacity, cut partway through, rotate the piece, and complete the cut from the opposite side.
Step 4: Finish, Cool Down, and Clean Up
Let the blade come to a complete stop before removing your cut pieces. Inspect the cut face for chips or unevenness while the material is still wet, since flaws show up more clearly.
- Drain and clean the water reservoir after every session.
- Wipe down the blade and tray to prevent rust and mineral buildup.
- Inspect the blade edge for chips or excessive wear before the next job.
- If the saw will sit unused for a while, coat the blade lightly with mineral oil to protect it.
What You Need Before Cutting Rocks With a Wet Tile Saw
Having the right saw, blade, and safety gear on hand before you start prevents mid-project surprises and wasted rock.
Saw and Blade Requirements
Any wet tile saw between 4 and 7 inches works, provided the water cooling system functions properly. The blade matters more than the saw itself.
Skip the segmented tile blade that comes standard on most saws. Pair the saw with a continuous rim diamond blade instead, since the unbroken edge produces smoother cuts with far less chipping on stone.
Blade bond quality also plays a role in how long an edge holds up under abrasive stone. DI Tool, for example, organizes its diamond blades by a color-coded bond system ranging from purple (very soft bond) to orange (medium bond), reflecting how quickly the bond wears to expose fresh diamond.
Its Early Entry diamond blade line spans 4 to 10 inches with a continuous rim design, giving hobbyists room to match blade size to their saw.
Rock Selection and Condition
Start with softer material before moving to anything harder:
- Agate and jasper — quartz-family stones, roughly Mohs 6.5 to 7
- Limestone — largely calcite-based, closer to Mohs 3, and noticeably easier to cut
- Granite — a mixed-mineral rock with quartz and feldspar grains, so hardness varies within the same piece
Harder material cuts slower and wears the blade faster, so build confidence on agate or jasper before tackling granite.
Safety Gear and Readiness
Required PPE for any rock-cutting session:
- Safety glasses or goggles
- An N95 mask or respirator rated for fine particulate
- Closed-toe shoes
The crystalline silica dust generated by cutting quartz-family stone is a long-term health hazard. OSHA's permissible exposure limit is 50 micrograms per cubic meter as an 8-hour average, with an action level of 25 micrograms, according to OSHA's respirable crystalline silica standard. Water suppression during cutting, plus a properly fitted respirator, keeps you well under that threshold.
Water protects your lungs, but it also introduces a separate risk: electrocution. Confirm your saw runs on a GFCI-protected outlet before you begin, since this is non-negotiable with water in the mix.
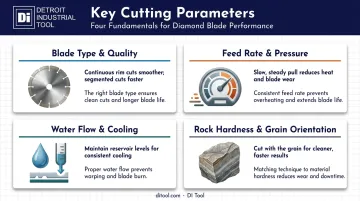
Key Parameters That Affect Your Cutting Results
Even with the right saw sitting in front of you, your results hinge on how well you manage a handful of variables during the cut itself.
Blade Type and Quality
A continuous rim diamond blade cuts cleaner than a segmented tile blade, which is built for ceramics and tends to chip stone along the cut edge.
Blade bond hardness matters too. Hard stone needs a relatively soft bond so worn diamond particles release and expose fresh ones underneath. A bond that's too hard for the material can glaze over and stop cutting effectively, according to Norton's diamond blade troubleshooting guide.
A worn or mismatched blade increases chipping, slows your cut speed, and can overheat the workpiece.
Feed Rate and Applied Pressure
Pushing too fast or too hard forces the blade to fight the rock instead of grinding through it naturally.
- Too much pressure causes rough, chipped edges and burns through blade life faster.
- Too little feed risks overheating from friction without enough material actually being removed.
- The right feed rate keeps the pull slow and steady, with barely any downward force, letting the blade grind through the stone rather than fight it.
Water Flow and Cooling
Consistent water contact cools the blade and turns cutting dust into a manageable slurry instead of airborne particulate. Insufficient water leads to blade overheating, warping, and the exact dry-cut dust exposure you're trying to avoid.
Check your reservoir level every few cuts. A saw that's been running for 20 minutes can burn through more water than expected.
Rock Hardness and Grain Orientation
Denser stones, and rocks with internal seams or fractures, behave unpredictably under blade pressure. Cutting against the natural grain or straight through a hidden seam raises the odds of the rock cracking mid-cut rather than slicing cleanly.
Inspect your specimen for visible fractures before you start, and orient your cut line to work with the stone's structure, not against it.
Common Mistakes and Troubleshooting While Cutting Rocks
Most failed cuts trace back to a handful of avoidable errors or warning signs that got ignored.
Common Mistakes to Avoid
- Pushing instead of pulling the rock into the blade, which throws more debris toward the operator.
- Cutting with low reservoir water, risking dry-cut dust exposure and blade damage.
- Forcing an oversized rock through in one pass instead of rotating it for a second cut.
- Skipping PPE because the blade "looks safe." Flying stone chips and silica dust don't care how calm the saw looks.
Troubleshooting Quick Reference
| Problem | Likely Cause | What to Check |
|---|---|---|
| Blade or rock feels hot | Excessive feed pressure or insufficient water flow | Check reservoir level and pump function, then slow your feed rate |
| Rough or chipped cut edges | Worn or wrong blade type, feeding too fast, cutting against grain | Blade condition, cutting speed, cut orientation |
| Rock binds or kicks back | Uneven pressure, unstable grip, angled feeding | Re-secure the rock with a firmer, even grip and realign the angle |
If you hit any of these issues repeatedly, stop and address the root cause before making another pass. Forcing through a problem almost always ends with a ruined specimen.
When to Use a Wet Tile Saw for Rock Cutting (and When to Consider Alternatives)
A tile saw is a smart entry point, but it isn't built for every project or material.
When a Tile Saw Makes Sense
It's best suited for small-to-medium hobbyist slabs, trimming preforms, and stone within the blade's depth capacity. A budget 7-inch wet saw runs around $64.99 and typically handles roughly 1 to 2 inches of material depending on the exact model, according to Harbor Freight's tile saw listing.
That depth figure varies by saw, so check your manual rather than assuming blade radius equals cutting capacity. The MK-370EXP, for example, is rated for 2 inches while other 7-inch models cap out lower. A tile saw is also a low-risk way for beginners to test lapidary work before investing further.
Alternative Method 1: Dedicated Lapidary Trim or Slab Saw
A 10-inch trim saw with automatic feed and a vise runs closer to $1,595. That's a significant jump from a tile saw, but it buys better blade longevity, tighter kerf control, and more consistent cuts for frequent use or larger slabs.
Alternative Method 2: Oil-Cooled Slab Saw
For very hard or heat-sensitive stone, oil cooling reduces cracking risk better than water. The trade-off is a messier setup and more maintenance, since oil systems need regular sludge removal to keep cutting clean.

Frequently Asked Questions
What is the best saw for cutting rocks?
A dedicated lapidary slab or trim saw offers the best precision and blade life. A wet tile saw with a continuous rim diamond blade is a capable, budget-friendly option for hobbyists working with smaller stones.
Can a wet tile saw be used as a lapidary saw?
Yes. Many hobbyists successfully use tile saws as entry-level lapidary saws, provided they swap in a continuous rim diamond blade and stick to appropriately sized material.
Do you need a wet saw to cut stones?
Water cooling is essential for both safety and cut quality. It suppresses hazardous silica dust and prevents the blade and rock from overheating, so avoid dry-cutting stone entirely.
Can I use a dry tile saw or cut rocks without water?
Technically possible, but not advisable. Dry-cutting speeds up blade wear and creates dangerous airborne silica dust, so wear a respirator at minimum if you attempt it anyway.
What blade should I use on a tile saw to cut rocks?
Choose a continuous rim diamond blade over a segmented tile blade. The unbroken edge produces cleaner cuts with noticeably less chipping on stone.
How thick of a rock can a tile saw cut?
Cutting depth depends on the specific saw and blade, commonly up to about 2 inches on a 7-inch model. For thicker rocks, rotate the stone and make a second pass to cut all the way through.