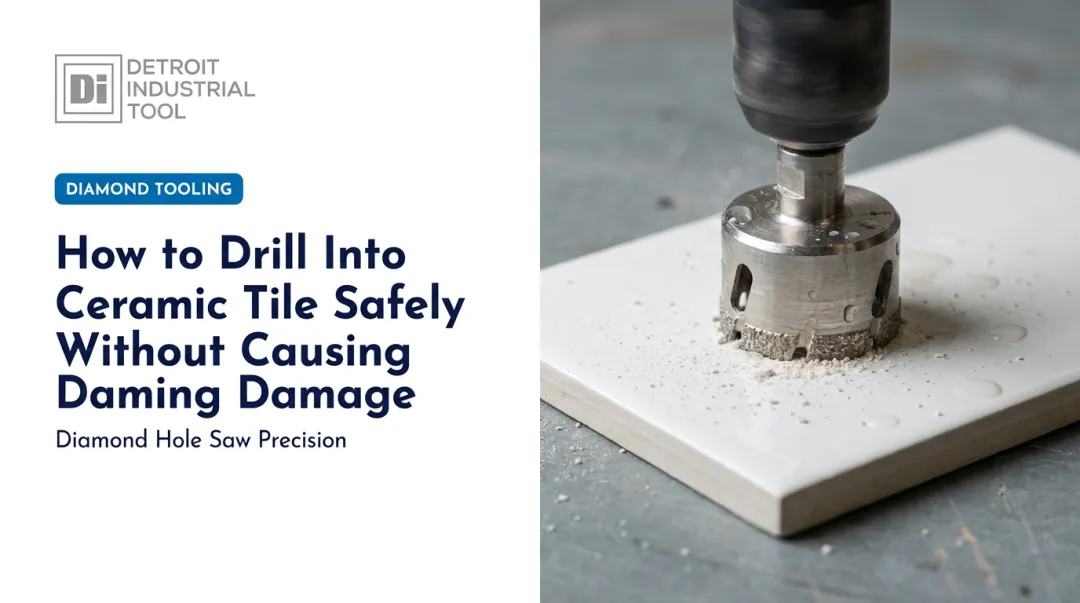

Before you start, know the difference between two approaches. Cutting a hole means making a full rectangular cutout inside a single tile. Notching corners means trimming the edges of four surrounding tiles so their corners meet around the outlet. This guide focuses on the full cutout method, since that's where most of the cracking and chipping problems happen.
We'll walk through the tools you need, the exact cutting sequence, the variables that separate a clean edge from a chipped mess, and the mistakes that ruin porcelain tile most often.
Key Takeaways
- Porcelain requires diamond-tipped tools such as wet saws or angle grinders — not manual cutters
- Score the tile's front face, then finish cutting from the back to avoid chipping
- Kill the breaker and verify with a current tester before touching any wiring
- Overcut slightly past marked lines for blade radius, then fill gaps with thin-set
- Rushing measurements or cuts causes more cracked tile than any other single factor
Tools and Materials You Need to Cut an Outlet Hole in Porcelain Tile
Porcelain's density puts it closer to natural stone than ordinary ceramic. RUBI notes that porcelain's hardness makes it significantly more demanding to cut than standard tile, which is exactly why standard blades and hand tools fall short here.
Primary Cutting Tools
- Wet tile saw — least dust, cleanest cuts, but requires more setup and a water reservoir
- Angle grinder with diamond blade — faster and more portable, though it kicks up significant dust and should be used outdoors or with a vacuum attachment
- Diamond hole saw / core bit — a specialized option best suited to round or plunge-style cutouts (pipe penetrations, conduit), not the square corners a standard outlet box needs
For rectangular outlet cutouts specifically, a wet saw or grinder with a straight blade will outperform a hole saw every time. Save the core bit for relief holes at interior corners or true round penetrations.
Marking and Layout Tools
- Tape measure
- Speed square
- Pencil (not a marker — pencil lines are more precise on glazed surfaces)
- Painter's tape, applied along the cut line to reduce surface chipping during the score pass
Safety Equipment
Dry-cutting porcelain generates fine silica dust. OSHA's respirable crystalline silica standard sets strict exposure limits for this kind of cutting, and it requires water-fed controls on masonry saws or a properly rated respirator when cutting dry. At minimum, wear:
- Safety glasses
- Cut-resistant gloves
- Hearing protection
- A dust mask or respirator for any dry-cutting work
Why Blade Quality is Crucial
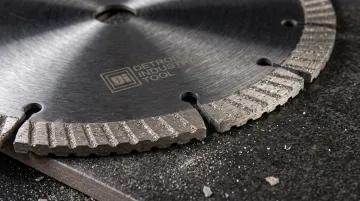
A dull or low-grade blade increases chipping, blade wander, and outright cracking. For this reason, continuous-rim diamond blades are engineered to produce smoother, chip-resistant cuts on dense materials like porcelain.
For example, DI Tool's Turbo Porcelain Tile Diamond Blade and J-Slot Premium Diamond Blade both use a continuous-rim design to ensure clean results. The J-slot pattern also helps dissipate heat, which extends blade life during longer cuts on hard surfaces.
Electrical & Finishing Touches
Finally, keep an electrical current tester on hand to ensure the power is off before you begin. You may also need outlet box extenders to bring the outlet flush with the new tile thickness.
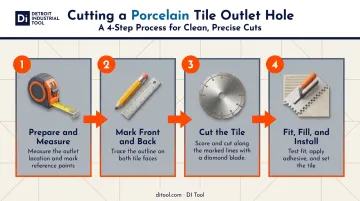
Step-by-Step: How to Cut an Outlet Hole in Porcelain Tile
Step 1: Prepare and Measure
- Turn off the breaker for the outlet and confirm it's dead with a current tester before touching any wiring or removing the cover plate
- Remove the outlet cover and loosen the outlet from its box to expose exact box dimensions
- Measure the box's height, width, and position relative to your tile layout, adding roughly 1/8 to 1/4 inch of clearance so the faceplate overlaps the cut edge cleanly
This clearance isn't arbitrary. The National Electrical Code sets a 1/8-inch limit on unrepaired gaps at a box edge. It also caps how far a box can sit behind a finished tile surface at 1/4 inch before requiring an extender ring, according to NFPA's reproduction of NEC 314.20 and 314.21. Staying inside those margins keeps your install code-compliant, not just cosmetically clean.
Step 2: Mark the Tile Front and Back
- Transfer your measurements onto the tile's front face using a speed square for straight, accurate lines
- Extend the marks to the tile edges, flip the tile, and mirror the exact same outline onto the back face
- Apply painter's tape along the front-face cut lines to help control chipping during the score pass
Double-check the back-face marks against the front before cutting. A mirrored line that's off by even 1/8 inch will throw off the entire cutout.
Step 3: Cut the Tile
- Score the longer vertical lines first on the front face using your wet saw or grinder, without cutting all the way through
- Score the shorter horizontal lines next, going slower here since short spans chip more easily
- Flip the tile and complete full cuts from the back, extending slightly past your marked lines to account for the blade's circular shape
That overcut allowance matters. A spinning blade curves into the material rather than cutting a perfect right angle, so pushing your cut about 1/2 inch past the corner marks compensates for that radius on the back face.
A diamond tile blade rated for porcelain—like those in DI Tool's lineup—holds that line more accurately than an all-purpose masonry blade, especially on dense, glazed material.
Step 4: Fit, Fill, and Install
- Dry-fit the cut tile against the outlet box, trimming small corners with tile nippers if it needs clearance for mounting screws
- Fill any overcut gaps or chipped edges on the back with thin-set mortar to reinforce the tile before setting
- Set the tile with mastic or mortar, use spacers, grout once surrounding tiles are set, then reattach and tighten the outlet before replacing the cover plate
Key Factors That Affect a Clean, Precise Cut
Porcelain's density and low porosity mean small variables in tool choice and technique have an outsized impact on your final edge.
Blade or Bit Type and Coating
Diamond-coated or carbide blades grind through dense material rather than chipping through it like a standard blade would. DI Tool's tile blades, for example, use diamond segments engineered specifically for porcelain's hardness rather than general-purpose grit. A worn or low-grade blade increases chipping, wander, and the risk of a mid-cut crack.
Cutting Technique and Measurement Accuracy
Cutting too fast generates heat and pressure porcelain can't absorb without cracking. RUBI's guidance on large-format tile cutting recommends steady, controlled feed rather than forcing the blade, letting the tool's RPM do the work instead of downward pressure. A slow, steady pass produces cleaner, straighter edges consistently.
Getting the mark right matters just as much as the pass itself. Porcelain can't be "adjusted" once cut, unlike softer materials that forgive a slightly off line. Inaccurate marking on either face leads to faceplate gaps or a cutout that lands directly on a mounting screw.
Wet vs. Dry Cutting
| Method | Advantage | Trade-off |
|---|---|---|
| Wet saw | Water cools blade and tile, reduces dust and cracking risk | More setup, water containment needed |
| Dry grinder | Faster, more portable | Higher heat buildup, more dust, greater caution required |
Water cooling reduces both heat and airborne dust, which is why a wet saw is generally the safer default for anyone cutting porcelain regularly.
Common Mistakes and Troubleshooting Tips
Most cracked tiles trace back to one of these errors:
- Skipping the front-then-back sequence: cutting straight through from one side alone almost always leaves visible chipping on the exit side
- Forgetting overcut allowance: results in a hole that's slightly undersized once the back-face cut is finished
- Rushing the shorter horizontal cuts: these crack more often since they have less supporting material around them
If the tile cracks mid-cut, you're likely pushing too much downward pressure or moving too fast. Ease off and let blade RPM do the work instead of forcing it.
If the finished hole is undersized or misaligned, check two things: whether your back-face marking was mirrored correctly, and whether you applied enough overcut allowance before flipping the tile.
Alternative Methods for Cutting Tile Around Outlets
A full rectangular hole isn't always the answer. When an outlet falls at a tile seam rather than mid-tile, corner notching across four tiles (sometimes called an L-cut or U-cut) often makes more sense.
| Method | Best For | Trade-off |
|---|---|---|
| Diamond hole saw / core bit | Round cutouts like pipe or conduit penetrations | Needs a drill with real torque, doesn't produce square corners |
| Rotary tool (Dremel-style) with diamond bit | Fine trimming or minor chip cleanup after the main cut | Too slow and imprecise as a primary cutting method |
| Hiring a professional installer | Large-format porcelain, complex layouts, expensive material | Added labor cost, but avoids wasting premium tile |
Quality diamond hole saws and tile blades, like those in DI Tool's lineup, make cleaner penetrations with less chipping along fragile porcelain edges.
For interior corners, drilling small relief holes before connecting them with straight cuts reduces the stress concentration that causes cracks at sharp 90-degree angles. This technique works regardless of which primary tool you choose.

Frequently Asked Questions
Can you tile around electrical outlets?
Yes. You can either notch the corners of four surrounding tiles around the outlet box, or cut a full rectangular hole in a single tile, depending on where the outlet falls in your layout.
Do you need to turn off the power before cutting tile around an outlet?
Absolutely. Switch off the breaker and confirm it's dead with a current tester before removing the cover plate or handling the outlet in any way.
What is the best tool for cutting an outlet hole in porcelain tile?
A wet tile saw or an angle grinder fitted with a diamond blade are the most reliable choices. Porcelain's density requires diamond-tipped tools; standard blades will chip or crack it.
How do you cut a straight hole in porcelain tile without cracking it?
Score the front face first, then complete the cut from the back. Use slow, steady pressure, and double-check that your front and back markings are mirrored accurately before you start cutting.
Can you use a Dremel to cut porcelain tile?
A Dremel-style rotary tool works for fine trimming or small adjustments after the main cutout is made. It's too slow and imprecise to serve as your primary tool for a full outlet-sized hole.
How much space should you leave around an outlet box when cutting tile?
Roughly 1/8 to 1/4 inch of clearance is standard, letting the faceplate overlap the cut edge without exposing gaps. This also keeps you within typical electrical code setback allowances.